Tag Archive for: gear

Stroppa is a relatively new comer in the camera straps landscape. They produce leather and rope straps that can cover different looks and usage. Let’s give a look to the Stroppa Flex, Active and Duo!

Stroppa Straps Camera Gear Review - Stroppa Flex & Active

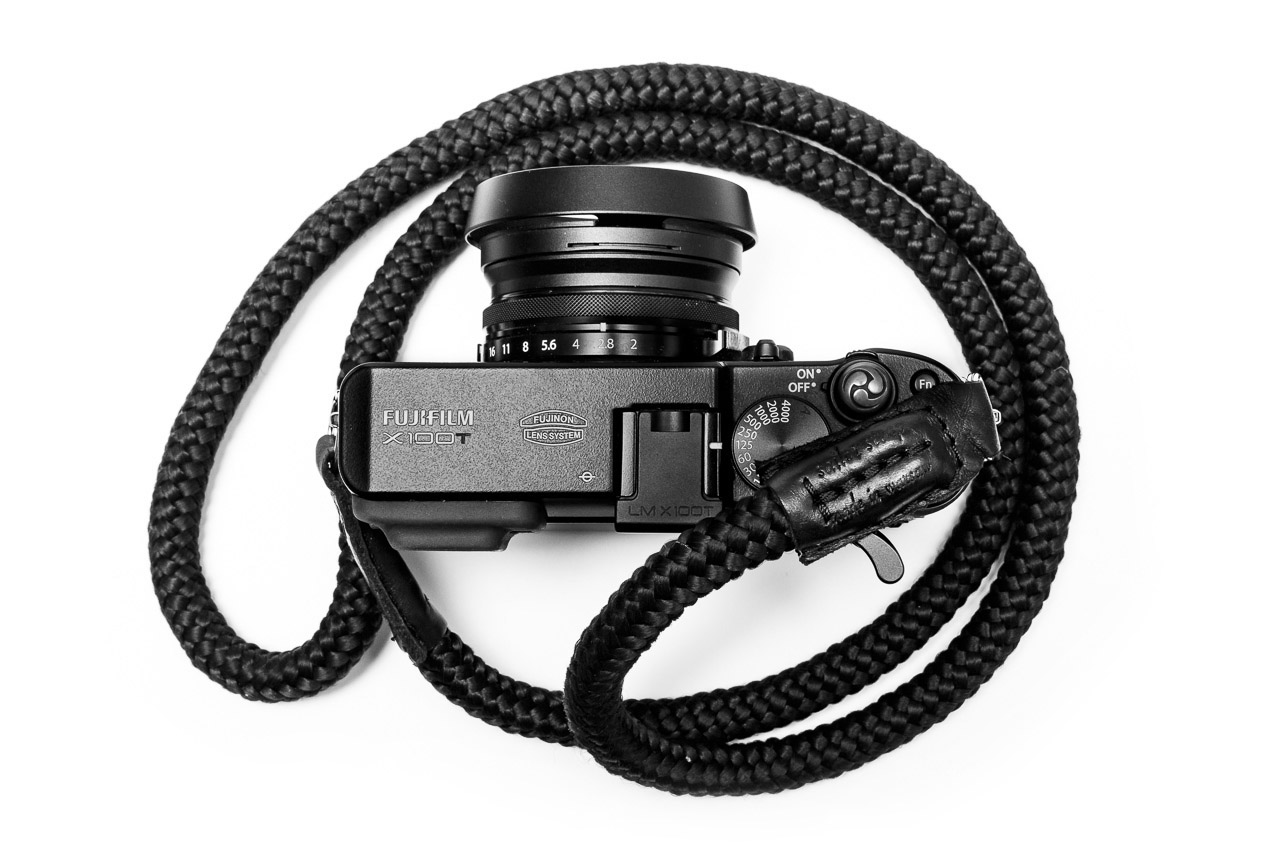
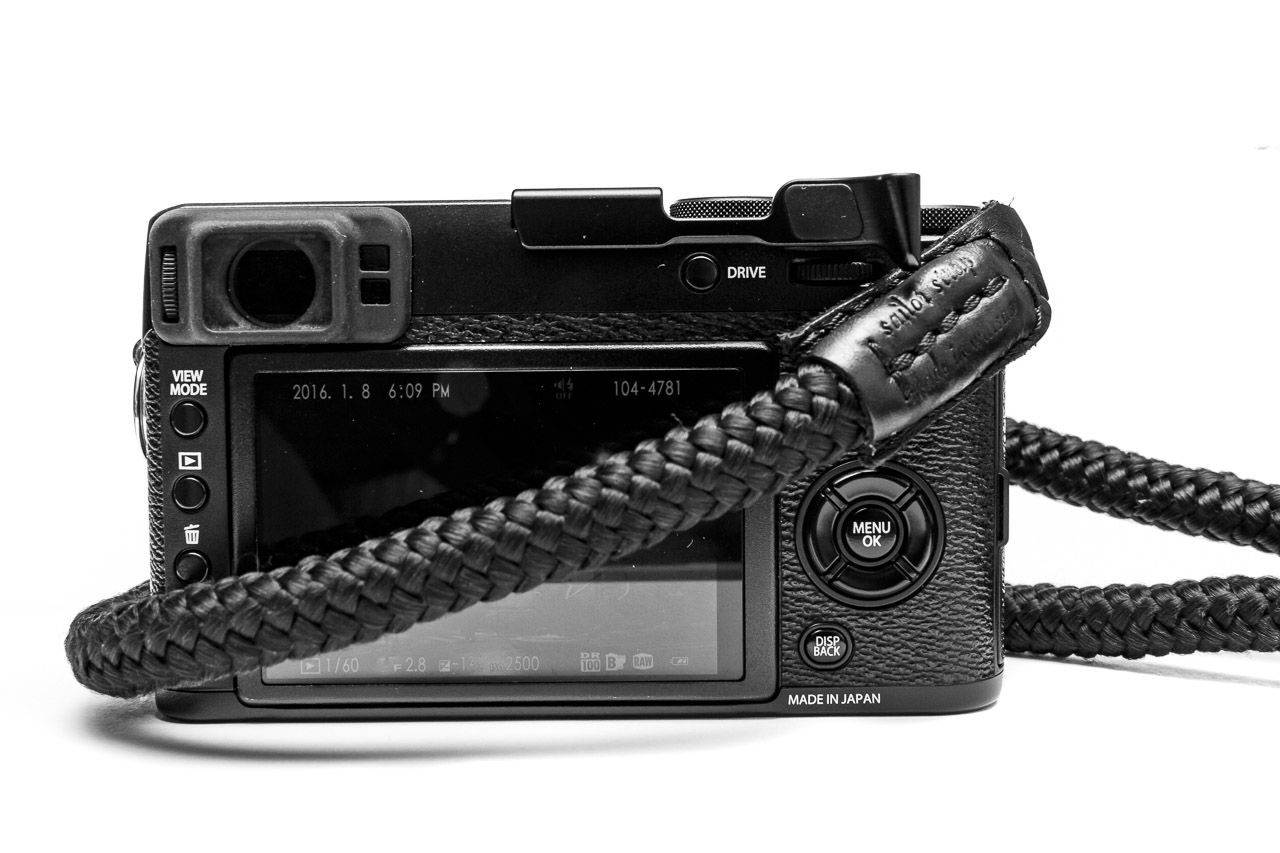
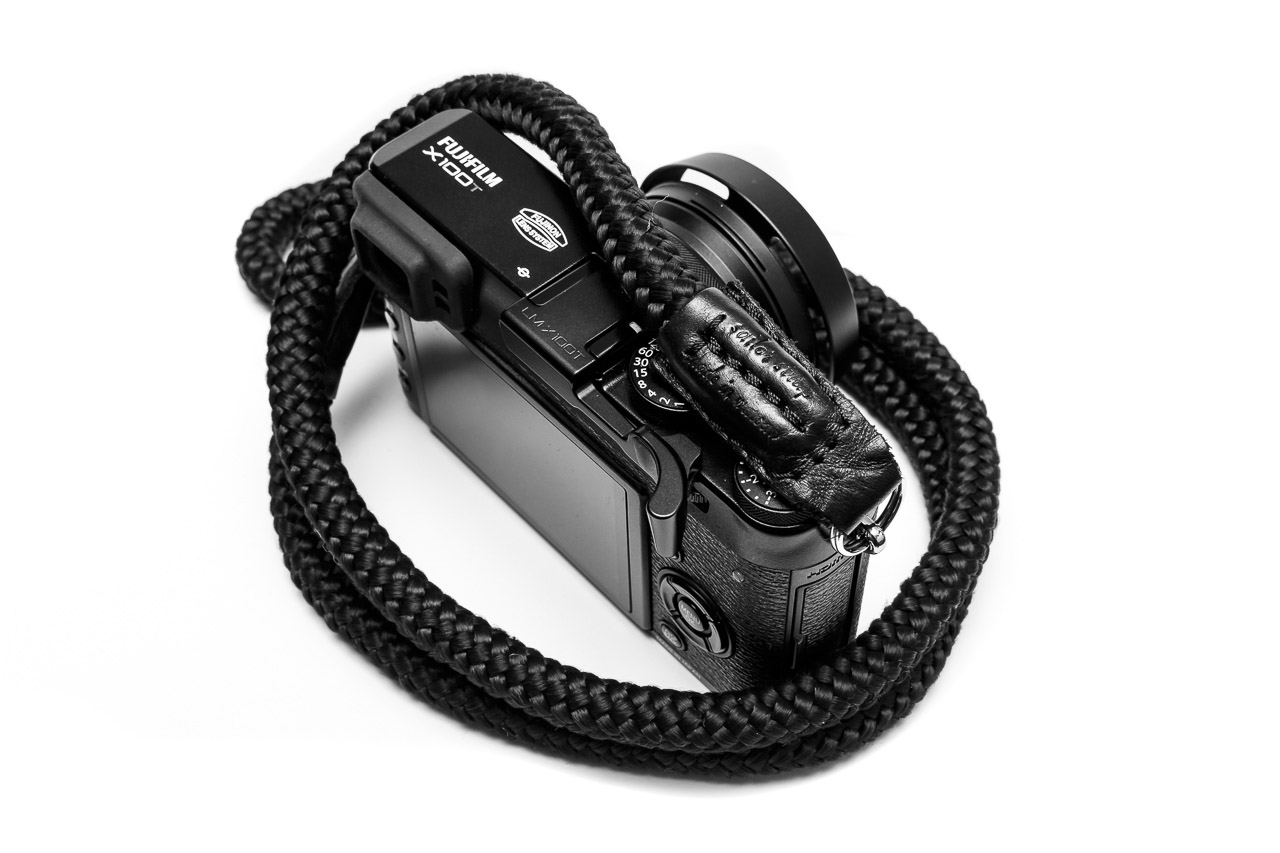
Flex attached on the Fujifilm X100T, Active next to it.

Common features

First of all, the first thing you see is the build quality. The Stroppa straps are handmade in Poland with high quality rope and leather, and it’s quite obvious when you unpack them from the little pouch they come with. The rope looks very good, for any of the three models (more on that later). The most impressive is the junctions between the rope and the fitting rings. It’s HUGE. Absolutely oversized. Which is both a positive, and a negative thing.

The positive side is that it feels like the strap won’t break anytime soon. It’s definitively an investment that will last. I’ll come back in a few months from now with an update, but after a few weeks it really feels it’s going to last. The leather junction between the rope and the rings is much bigger than any other straps of this kind. The leather is still new and pretty stiff. It will get smoother for sure, but I don’t expect the junction to become as flexible as other brands’ are. It feels very well on the beefier cameras I own such as the Praktica or the Canon AE-1. However, on smaller ones such as the X100T I need to hold the junction with the camera as a kind of grip, so that it doesn’t go in my way.

So on one side you gain with build quality and toughness, but on the other side you lose with practicality, depending on your camera. My feeling is that the Stroppa straps were developed with film or larger digital cameras in mind that the pocketable X100T.

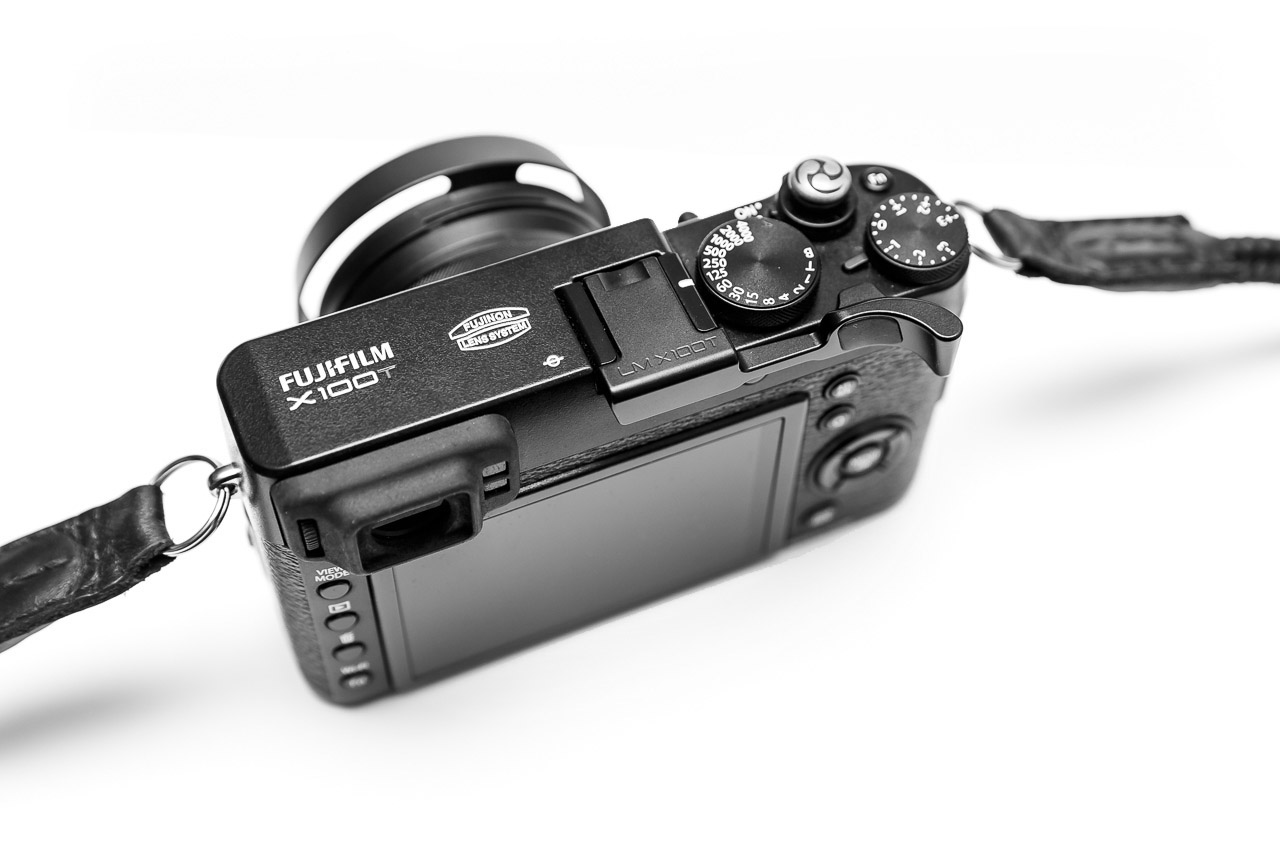
A small detail, but that matters: the rings are sturdier than most of the other straps on the market, but also feature a longer single row that most of them. I just love this, as my other straps often get stuck in the X100T’s very thin attachment. Only once I did have to intervene, while it’s a daily job with my others straps to unstuck them. Well done!

Stroppa Straps Camera Gear Review - Stroppa Duo

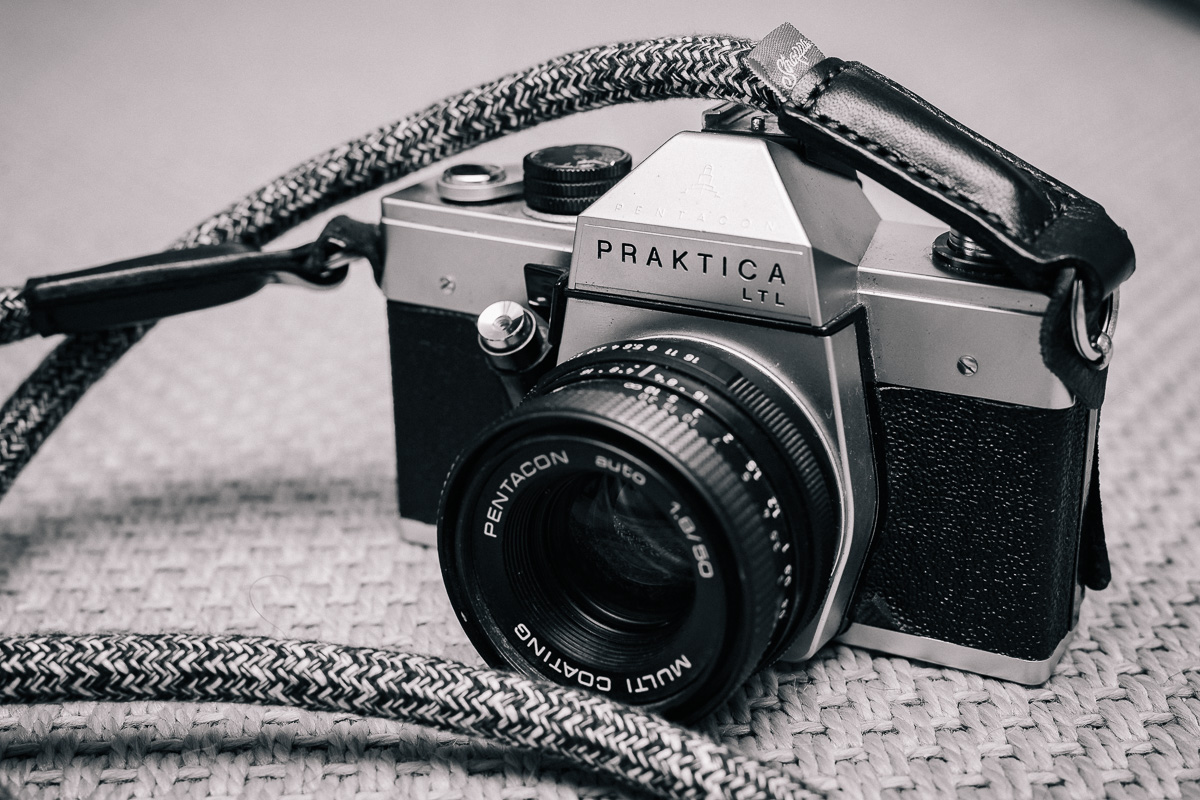
Duo on my old Praktica.

3 straps you said?

Yes, the Stroppa line has, at the beginning of 2017, 3 models: the Flex, the Active and the Duo.

The Flex is the one that, at least to me, seems to make the most sense. It’s the most flexible of the three, the one that seems the most practical in a daily basis. The rope is made of polypropylene silk. I like to roll my straps on my wrist rather than hanging it at my neck when attached to my Fujifilm X100T. Its additional flexibility is a must in this scenario, and it did a perfect job. The Flex is available in Black only, but more colors are to follow soon.

The Active is the strong one. Its rope is made of poliamid threads for it to resist the abuses of harsher environment… or heavier cameras. It’s quite obvious when side by side with the other 2 models. The rope is thicker, stiffer too, and definitely support heavier cameras than the Flex. Because of that, forget about rolling it around your wrist. However, it will be a great companion for my Canon 6D. In this case, the strap is mostly a third hand for when I change my lens, or a security feature by rolling is, with just one loop usually, on my forearm. It will fit perfectly… once I have a solution to pass the Active’s heavy-duty rings in the Canon’s small strap attachments. The Active is only available in black.

The Duo sits in the middle between the Flex and the Active. It feature the same silk as the Flex, but with a denser, and bi-color threading. It’s the go to strap for those who have a slightly heavier camera but still want more flexibility than the Active. It will be a perfect match with camera that sport a grey-and-black color scheme, such as my old Praktica. I must admit that at first, it was the strap that I was the less interested in because of its colors. But after some usage, it’s the one I prefer being in the right spot of flexibility and sturdiness. If in the future the Duo comes in full black, it may be very possible that it will fit on more cameras of mine 🙂

Stroppa Straps Camera Gear Review - Stroppa Flex

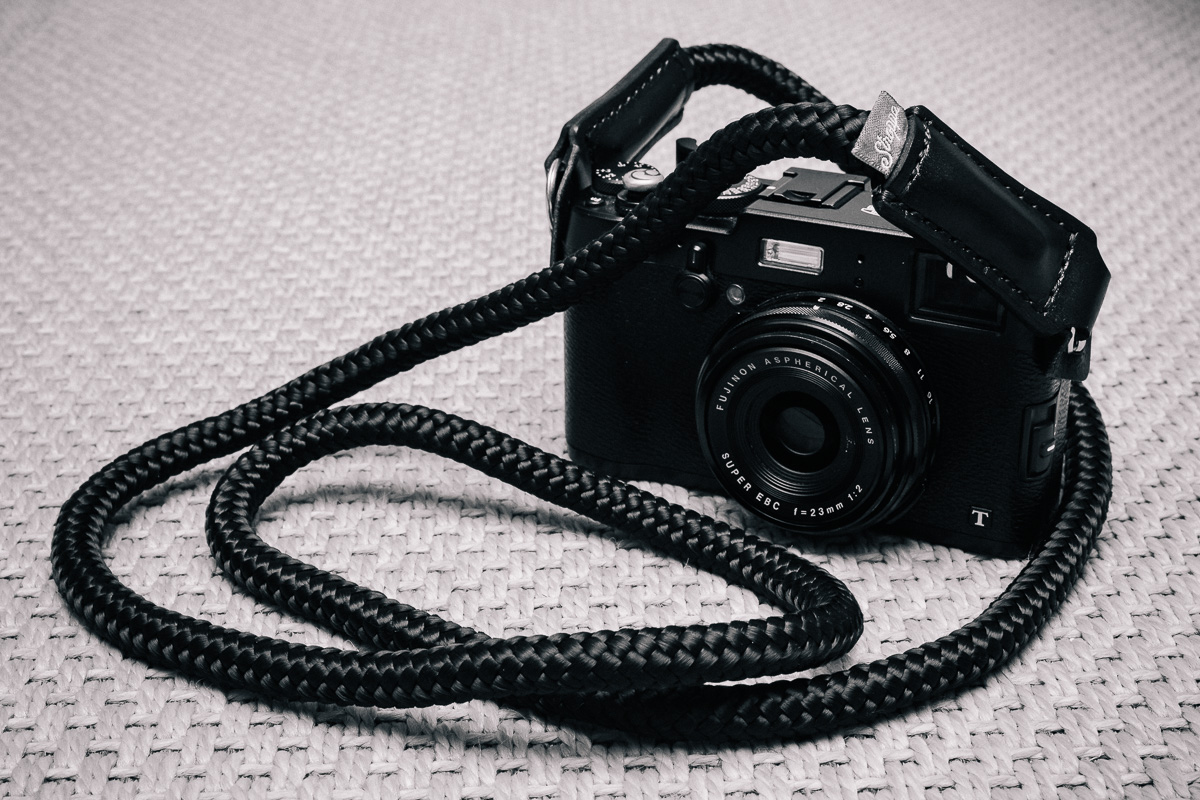
Flex on the X100T. Big junctions are big.


Conclusion

Overall, I am very pleased with the few weeks spent with the Stroppa straps. As previously stated, I feel they fit better with beefier cameras rather tan with smaller, pocketable ones. The Flex will be on my Canon AE-1 (once it comes back from the doctor’s office 🙂 ), the Duo is on the Praktica, and the Active will soon be on the Canon 6D. The X100T is keeping its older strap with the more flexible junction, for the time being.
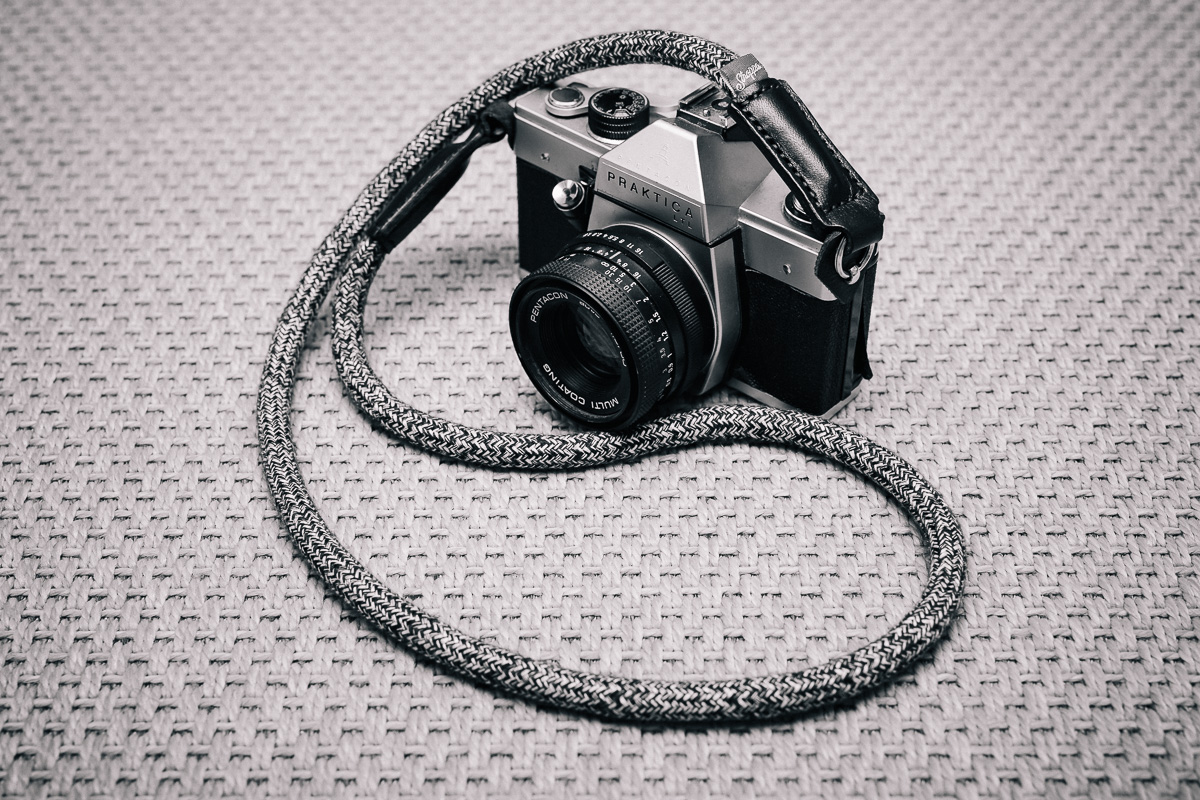
Stroppa Straps Camera Gear Review - Stroppa Duo

Duo on Praktica.

Where can I find the Stroppa strap?

It’s pretty easy! Go to Stroppa’s website and have fun 🙂

Note: the straps were given to me free of charge for this review. However, it doesn’t impact this review’s objectivity.

Keep on accessorising

Once I got a better grip on my Fujifilm X100T, I thought it may be a good idea to try a neck strap. I’ve been avoiding it since I’ve had DSLR because of their weight and the stress it gives to my poor and delicate neck 😉 I wanted something comfortable but also easy to fold and put in my pocket with the camera.

Sailor Strap LT on Fujifilm X100T


Enter the Sailor Strap LT. neck strap

While browsing the same interwebs for a solution I came across those silk rope neck straps and immediately felt in love with it: I needed one. There I found Sailor Strap which produces those handmade straps in Poland, at a correct price with free shipping! There is a bunch of different finishes so there is lots to choose from. Ordered, delivered a few days later, let’s put it on the camera right now!

Each side of the strap has an O ring which is a bit too larger for the X100T mounting rings. Place the thinner part of the O ring in the mounting rings and it will be OK but a bit too rigid. A thinner O ring, or an intermediary one, may be welcomed. The build quality is second to none, the polyester silk rope feels solid and soft at the same time, the thick leather has sturdy stitches, I immediately became confident I did the right choice going the handmade strap road. The black color matches quite well the camera’s color.
Sailor Strap LT on Fujifilm X100T

In action

The soft touch of the polyester silk is a pleasure on the neck. Even kept a few hours during a hot day, no irritation, no sweat, not even a bit of pain. The rope deforms a bit to absorb the weight on the neck, reducing the feeling of the (not very heavy though) camera hanging and bouncing. It’s also quite easy to make a knot for using it as a larger wrist strap if needed. It folds very well around the camera’s lens and therefore doesn’t really add bulk when the camera is in my pocket.

It’s been already 3 months since I have this strap, it is constantly thrown in a backpack or compressed in a pocket, and it still look as good as new. As Sailor Strap uses sailing rope – which must be resistant, you’re not kidding in the middle of the ocean! – this is not a surprise. That was also a motive for my buying this strap, I want durability for my gear, I don’t nurture it at all.

Note that those straps are designed for mirrorless and small DSLRs in mind. Don’t expect them to bear the weight of your pro DSLR with a 70-200 on it!

As an unexpected side effect, I can now shoot at chest level in a more stealthy way than before: having my hand on the camera, which itself hangs on my neck, I stabilised it horizontally by keeping the strap tense enough, and I shoot what or who is coming at me. It looks like I’m just holding my camera, no one sees me.

Sailor Strap LT on Fujifilm X100T

Conclusion

I’m very glad I got the Sailor Strap LT. It was a long shot as I’ve never like neck straps, but I am more than pleased that I went this way. Sturdy but with a pleasant finish, good looking, comfortable, what to ask more? Check out Sailor Strap’s website to find the finish you want!

Sailor Strap LT on Fujifilm X100T

Sailor Strap LT on Fujifilm X100T

Small camera, big hands

When I first tried the Fujifilm X100T (review here) at Yodobashi Akihabara in Tokyo, I was very pleased by its small size hand good handling despite my larger hands. I bought it s few months later, but immediately a problem appeared: it was impossible for me to get a comfortable grip on the camera, without becoming painful after 30 minutes. I searched over the interwebs and…


Lensmate Thumbrest on Fujifilm X100T.

Enters the Lensmate Thumbrest

The Lensmate Thumbrest is tiny little piece of black aluminum that came directly from the USA to my mailbox and was installed a a few nanoseconds in the hotshoe of the camera. The first impression is mainly positive: pieces of rubber make sure the Thumbrest sits well and tight in the hotshoe, as well as under the small part that will sit on the top of the camera. Another one placed under the thumb gives even more grip. Everything feels solid. The shutter speed wheel is a bit hidden by the thumb rest but no big deal for me. The small wheel at the thumb is however trickier to reach and use now. Nothing too harsh, only the people with the bigger fingers may be affected. The only “issue” is that the black color is not exactly the same as the top of the X100T, which hurts my OCD. But it’s quite close, so no really big deal.


Lensmate Thumbrest on Fujifilm X100T.

In action

With the Lensmate Thumbrest mounted on the camera, the grip is instantly improved. I am now confident I can keep my camera in my hand for a long time. You don’t need to handle it firmly, you’re not in pain anymore. And it doesn’t add to the bulk a grip does. After a few months of abuse I’m also delighted to see the is no fiddle in the hotshoe, which was one of my concerns when buying a thumb rest. Everything is still in place, not moving a millimeter.
Lensmate Thumbrest on Fujifilm X100T.

Conclusion

As a short, I’m delighted with the Lensmate Thumbrest which adds only pluses to an already great camera. It’s an accessory that will be added by default to all my cameras that need better grip. The only caveat remains the black color which is not the same as the camera… it could be worse, right?

Think different.

OK, I might be shamelessly stealing Apple’s famous slogan, but that’s truly how I feel about Fujifilm’s X100T.

Run! Bucharest, Romania, 2016.

Run! – Fujifilm X100T – B&W simulation – f/2.8 – 1/125s – ISO 6400. Get an original, signed print in limited edition.

At the time I’m writing this article I’ve been using the X100T for 2 months. 2 months where my photography has changed, and hopefully improved, quite a bit.

I’ve been shooting for the last year mainly Canon DSLRs, with some incursions into the Nikon territory, always using the top-tier full frame gear. Image quality wise, nothing to say, great stuff, consistent results, what pros or serious amateurs want. You know your camera; it delivers the stuff without bad (or good) surprises. This setup has, at least for me, one drawback: it kind of lacks soul.

This is what struck me with the X100T: it doesn’t feel like a camera, it more feels like a photography companion, a friend that sticks with you and want to help you get different shots. The shooting experience is second to none, Fujifilm really did a photographers camera, not a geeky specs maxed out camera. Which is not necessarily a bad thing, when well executed.

Fuji’s approach in having the main controls directly accessible by hand (Aperture, Shutter speed and Exposure compensation) is a great idea. When using the X100T it feels like I’m back using my films cameras, where there is no menus, no screen full of information… It doesn’t mean Fujifilm’s camera isn’t packed of features, it just mean that there is no need to go thru the menus every second shot. It’s a much more tactile feeling that with the current DLSRs, something I am very sensible on. I like to touch things, have direct buttons and controls rather than browsing a screen.

Exit light... enter night. Cluj Napoca, Romania.

Strangers in the Dark I. Fujifilm X100T – f/2.8 –  1/60s – ISO 1600. Get an original, signed print in limited edition.

I usually just set my aperture, shutter speed and exposure compensation, and let the camera choose itself the ISO value. It has a very practical Auto ISO mode (actually, 3 modes) with minimum and maximum ISO values, as well as the slowest speed it can go if you let it have control of the shutter speed. In this setup I can forget the fact it’s a feature packed digital camera and browse the streets focusing on what’s happening, looking at nothing but my viewfinder. If I need to change a setting, it’s a wheel to rotate, nothing else. Just like a modern film camera.

The X100T packs Fujifilm’s X-Trans 16MP APS-C CMOS sensor. I must say I was a bit reluctant in going back to APS-C after years of full frame. I’m pretty please of the results: this sensor coupled with the 23mm f/2 lens (35mm equivalent in the full frame world) gives quite sharp pictures, with a very acceptable noise up to ISO 3200. ISO 6400 is still usable, but with less margin than a full frame camera such as my Canon 6D. Actually I like having a larger depth of field for street photography, so the APS-C sensor may actually be a plus for the X100T.

Strangely, I would say image quality doesn’t really matter for this camera. Its scope is not to replace my 6D in every single usage. Its scope is to be with me all the time, in my pocket, in my bag, everywhere I go.

Having a large camera taking awesome shots is great, but at some point you can’t have it with you all the time, you can’t be discrete with it. It’s big, heavy and cumbersome. Very often I didn’t take my large DSLR rig with me at events or party, having to rely on my phone or on crappy point and shoot camera, and missed awesome shots? Way too much. How often did I miss an incredible candid expression in the street because I got spotted in the last moment with my big camera? Yeah, you got the idea.


Baker Street Underground station. London, Great Britain, 2016.

Baker Street Underground station. Fujifilm X100T – B&W simulation – f/4.0 –  1/60s – ISO 3200 – Get an original, signed print in limited edition.

While I know I may not get the ultimate image quality with this small camera, I know I’ll be able to get “good enough” shots in the very last majority of times, including shots I would have never had with my big rig. And that is priceless to me. That is a new way to take photographs, being and feeling always ready to shoot. It keeps me more alert in the streets, more attentive to details, colors and contrast.

That’s where I feel I’ve improved my photography in the last weeks. I’ve went from capturing a scene in a very clinical way, searching for maximum sharpness and having the frame full of details, to something a bit more abstract, less “ultimate image quality” oriented to a more “feeling” oriented photo. Exact like how I feel when using my Canon 6D versus my Fuji X100T.

And the funny thing is all of that… is that every single photographer that have used my camera in the last weeks have all felt the same way 🙂

One last thing… for the first time in years I’m comfortable shooting JPEGs. Fujifilm has done an incredible work having a reliable auto white balance, and pretty awesome film simulations giving a great look and the correct dose of instant gratification on any shot you’ll take. You can even bracket the simulations and decide later what to keep. The simulations are also available as camera profiles in Adobe Lightroom, so even if I shoot RAW I can process them much faster than the Canon RAWs. In general, I feel that the Fuji RAWs are easier to process than Canon RAWs.

Little girl. Cluj-Napoca, Romania.

Little girl. Fujifilm X100T – f/5.6 –  1/500s – ISO 1600 – Get an original, signed print in limited edition.

Of course, not everything is perfect. The battery life is ridiculously short; it’s like when I got my first smartphone, always looking for a plug to charge it! Hopefully it can charge via USB, so I don’t need to take the external charger with me. But I know that for a walk of more than half a day I need a second battery.

My second regret is the choice of a focus by wire for its lenses. I just don’t like the feeling of it, without beginning or end, without depth of field scale. I enjoy zone focusing for my street shots and I can’t do it without looking at a screen. However, manual focus is a child’s game thanks to the hybrid viewfinder and the focus peaking with zoom on the focus zone.

Last regret, that its lens is not a 50mm equivalent, which is ma favorite focal length. At least this way, at 35mm equivalent, it gains versatility. And there are the two 28mm and 50mm equivalents you can screw on the filter thread, if needed. But it adds to the bulk, so no way for me, for now.

So, in the end, I’m really pleased with my experience with the Fujifilm X100T (if it wasn’t obvious already J). It has become like an extension on my right hand, it’s my photography companion that is always there for me. It’s often called the “poor man’s Leica”… let’s say I’m glad I’m a poor man! And last but not least, I feel like a better photographer, which is pretty much every photographer’s goal, no?

Edit: The X100T gets even better for me with the addition of a Lensmate Thumbrest!

Dutch angle. Cluj-Napoca, Romania.

Dutch angle – Fujifilm X100T – f/5.6 –  1/500s – ISO 320 – Get an original, signed print in limited edition.

Airport stairs. Munich Airport, Germany, 2016.

Airport stairs – Fujifilm X100T – f/8.0 –  1/125s – ISO 6400. Get an original, signed print in limited edition.

Barcelona. Cluj-Napoca, Romania.

Barcelona. Fujifilm X100T – Classic Chrome film simulation – f/5.6 –  1/250s – ISO 6400

Surprise! Cluj-Napoca, Romania, 2016.

Surprise! – Fujifilm X100T – B&W simulation – f/2.8 – 1/60s – ISO 1600. Get an original, signed print in limited edition.

Strangers in the dark III. Cluj-Napoca, Romania.

Strangers in the Dark III. Fujifilm X100T – B&W simulation – f/2.8 –  1/60s – ISO 6400. Get an original, signed print in limited edition.

Important for an amateur, critical for a pro, a proper backup solution is something not to leave for later, as later might be too late!

Hard drive backup

Photo by Christian Jansky

Here are a 3 rules that should, ideally, be applied:

  • Back up everything

Avoid at all costs not having at least 1 duplicate of a photo. That means at least one on your computer and one on an external drive, for example. As good and reliable are the hard drives today, there is always a risk for them to fail at some point, which means you may lose a few shots… or the whole drive’s content.

  • Back up often

Having a backup option is nice, using it is better. Back up often, there is nothing worst that having all the tools, but still losing content because they’re not used properly. There are scripts and software, free or not, that will help you with that task by making it totally automatic.

  • Back up offsite

Last but not least, don’t forget to make an offsite backup. Who knows what can happen, having all you backups on the same place is not a good idea: theft, fire,… You may lose anyhow all your data. Plan to have an offsite backup somewhere, preferably in another city, that will keep your data safe and sound.

So, how to backup my photos?

  • External hard drives

The easiest solution. They come with the largest capacity of all, and you always have the possibility to recycle older drives (as your backup drives will not be extensively used).

  • CDs/DVDs/Blu-rays/etc

It requires a bit more work than the hard drives solution, and may not be rewritable. The biggest issue is the much smaller capacity, as well as the trend of getting rid of optical supports. It is also the cheapest solution.

Note: depending on the studies, optical supports may offer a longer lifespan than hard drives.

  • Network Attached Servers

The Network Attached Servers, or NAS, are fantastic backup solutions. A NAS is basically one or several hard drives plugged on your network, ready to receive your content. Paired with an automation software, you will not even need to plug an external drive to your computer. The more advanced ones offer interesting features as a remote access (to reach your NAS from the other side of the Earth for backing up your travel photos), multimedia options, etc… I personally use an old Synology DS111, an older generation model with only one 4TB hard drive. It’s enough for my needs, for now.

Note that NASes accepting several drives usually offer RAID features, having for scope to offer more performance and/or more redundancy. However having a redundancy oriented RAID doesn’t mean there is no need to duplicate the files anymore, as the NAS server itself may fail and you may lose your data anyhow.

Its main disadvantage is the money investment at the beginning, that may be a blocker.

  • Cloud solutions

Definitely the easiest and safest solution to run, but also the slowest and usually the most expensive. You can rent a cloud space somewhere on Internet and back up your photos in a redundant, secure place. It relies on the speed of your internet connection (uploading a few TB of data may take days, or even weeks…), and can get expensive for a large amount of data. Last, but not least, some photographers might not be comfortable having their files on a third party server. I would however bet that in a near future it will become the default solution for a majority of us, as the internet connections gets faster and the storage costs go lower.

How do I do, what is my actual backup workflow?

After a few years of not backup anything up at all, I switched to just having a few DVDs burned once even other months. As my needs grew and grew (shooting more and more, in RAW, and not just random personal photos) I had to switch to a more serious backup workflow.

  1. Daily, I save the content of my SD card on my main laptop (only the photos from the last time, of course). There goes the Lightroom import of the RAWs etc… I leave the photos on the SD card. By the way, I’ve set up Lightroom to automatically write XMP files, in case my catalogue gets corrupted, or if I want to import a RAW in another software.
  2. An Rsync script runs daily to back up the new content on my NAS. Rsync is very powerful as it knows how to ignore already existing files, avoiding useless network traffic with 20+ MB RAWs when backing up my current folder (as I wrote this article, the “2015” folder). So at this moment I have 3 copies of a photo: 1 on the SD card, 1 on my computer, 1 on my NAS.
  3. Every 2 to 3 weeks I do a backup on an external drive at my parents’. It is my offsite backup.
  4. I keep the photos as long as possible on my SD cards, emptying them only once I do the offsite backup. I also keep them at my office, acting as a temporary offsite backup.
  5. I also generate JPEGs that I put on my NAS and website’s server, for an easy browsing but also as another offsite backup.
  6. So I finish with:
    • 1 RAW on my computer
    • 1 RAW on my NAS
    • 1 RAW offsite (at my parents or at the office)
    • 1 JPEG on my NAS
    • 1 JPEG offsite on my server

I’m really thinking about replacing the last 3 steps by a cloud oriented solutions, but for now I find the costs to be a bit too high. I’m confident that in the next years I will take the plunge.

In the end, backing up is only a matter of priorities. Are your files critical or not? Are you ready to take a risk with them? How much will the cost of your files cost you? Once you figure this out, the rest will be easy 🙂